
The popularity of WordPress content management systems is massive in terms of website management. With widespread usage, it also comes with some security vulnerabilities that need attention. Thus, businesses and individuals are investing more in WordPress website security management.
You can protect the online presence of your WordPress site by implementing appropriate security measures. There are some best practices that you can easily follow to secure your site. Ultimately, this will help you prevent data loss and save your valuable business and investment.
In this article, we will discuss WordPress security and some common threats. Then, we’ll share with you the best practices for keeping your WordPress site secure from hackers.
Maintaining WordPress website security is mandatory if you want a successful online presence. WordPress has become the prime target for hackers since it powers more than 43% of websites around the globe. According to Forbes, around 30,000 websites are getting hacked every day. Besides, 60% of small businesses stop their operation within 6 months due to cyberattacks.

Here are some common WordPress website security issues:
Plugins and Themes: Plugins and themes can become a security risk if you do not update them regularly. Besides, poorly written code in a plugin or theme can become a weak spot for cyberattacks. Recent stats show that 90% of the security breaches are happening due to plugin vulnerabilities and 6% due to themes.
Brute Force Attacks: Continuous unauthorized login attempts are known as brute force attacks. Hackers can get access to your site’s dashboard if they find a successful combination of your password.
Malware infections: There are numerous malicious software programs that can attack WordPress sites. Security threats like viruses, trojans, and worms can harm your website and steal sensitive data. It can also disrupt your site’s functionality and be used for illegal purposes.
The consequence of a vulnerable WordPress site is far beyond your imagination. Here are the things that you will face if your site is not secure:
Now, you are aware of the common sources of threats and their consequences on your site. So, let’s learn the tactics to prevent and maintain your WordPress website security threats.
Regular updates are the most common and easy tasks for WordPress website security maintenance. This is crucial since each update for plugins, themes, or WordPress core comes with necessary changes. These updates mostly include more features, improved performance, and enhanced security.
Usually, WordPress updates its core application every now and then with necessary features and security updates. However, the plugins and theme updates depend on their developers or the related company. They provide updates whenever they find a security update or a feature update necessary.
You can automate the WordPress version updates if you are using a managed WordPress host. You can also automate the plugin and theme updates by enabling the auto-update feature within the WordPress dashboard.
There are some plugins like Easy Updates Manager and WP Auto Updater that automatically check for updates. These plugins can automate the entire update process without breaking your site, activating maintenance mode, or causing any errors. You can rely on professional WordPress maintenance services to handle the entire update process.
Warning: WordPress 6.5+ requires PHP 8.0+ for security patches. Older PHP versions have 3x more vulnerabilities.
This is the most common line of defense for preventing hackers from accessing your website. It helps you safeguard your site against brute-force attacks.
Hackers can easily break simple password combinations, which is the primary way to penetrate your website. Weak passwords also make your site vulnerable to malware infections that can steal your data.
So always use a strong username and password for your WordPress site with some basic settings. First of all, make sure your password is easy to remember. Then, it makes it unique by combining uppercase and lowercase letters, numbers, and special characters.
But what if you are not ready to manage your website password? You can rely on plugins like Passwords Manager or Dashlane to manage your passwords. Besides, you can hire website management services for overall website management, including security.
Furthermore, update your password regularly for better WordPress website security management. Change your password whenever you suspect a breach or unauthorized access attempt. Plus, choose two-factor authentication to add an extra layer of protection to the login process.
Note: Everyone accessing your website must follow these best practices.
You can stop unauthorized access to your WordPress site by changing the default WordPress login URL. Changing the standard /wp-admin or /wp-login.php paths can stop brute force attacks.
Custom URL makes your login page stronger and more challenging for anyone to access via the original login page. It discourages hackers from accessing your site by showing that you have strong security measures in place.
With a custom URL, you create a unique user experience and outlook for your customers. This uniqueness builds trust within your users when they see you are maintaining strong security measures.
You can avoid the hassle of changing the Login URL by yourself by using plugins like WPS Hide Login. Use this plugin immediately after installing, activating, and configuring its settings. You can enter your custom URL slug like “my-custom-login.php” using the plugin. Lastly, make sure to test the URL and provide it to your hosting provider.
As a website owner, you can limit the login attempts on your website whenever you want. This is another WordPress website security best practice that helps protect against brute force attacks. This approach minimizes a user’s login attempts so that attackers cannot leverage too many login attempts.
Limited login attempts also encourage users to be extra careful about using their login credentials. It also blocks users who attempt too many false logins. As a result, attackers move on to their next target, skipping this security measure.
Limit Login Attempts Reloaded plugins help you maintain best practices for securing WordPress login and user accounts. After installing this plugin, you can simply navigate to Settings > Limit Login. Then, you can configure it to limit login attempts, set lockout duration, and enable notification on lockouts.
There are many hosting providers with attractive ads out there in the marketplace. But while choosing, you must ensure it takes WordPress website security seriously. Your hosting service provides the foundation of your website. Thus, it must ensure the following security measures:
You can go on with managed WordPress hosting services that maintain the security measures that we mentioned. WP Engine, Hostinger, Bluehost, and GoDaddy are some of the best-managed WordPress hosting providers out there.

A reliable hosting service offers strong security practices with features like IP blocking, Malware scanning, and automatic updates. Plus, you will get expert support to resolve any security issue right away.
You have to put your effort into regular security audits to ensure your WordPress website’s security and integrity. This approach will help you evaluate all the essential security measures of your website. Plus, you can configure the security measures after finding the vulnerabilities during audits.

Audits can help you determine whether your site needs any updates on core WordPress, plugins, or themes. Try to remove the plugins that you are not using anymore.
With regular Audits, you can evaluate the effectiveness of your ongoing security measures. For example, you can check your website’s firewall and configure security plugins and backup solutions.
With regular audits, you can also monitor all user access and give permission to your site. You should regularly review user role permissions and remove suspicious accounts. This will help you assess that only authorized users are gaining access to your site.
Regular WordPress website security audits motivate you to be aware of the latest threats. As a result, you can make the necessary changes to your site’s security strategies.
You should grant file editing permissions only to authorized and trusted users of your WordPress site. File permission enables users to read, write, or execute files and directories of your site. So, categorize the users and limit their access to your files according to their user role.
WordPress generally offers 755 permission settings for directories. It allows read, write, and execute permissions for site owners. However, other users can only read and execute the directories.
The default value for file permission is 644, which allows read and write permission for owners. However, others have read-only permission to use these settings.
The best practice is to assign specific or necessary permission to files and directories. Restrict the permission for critical files like wp-config.php to 640 settings. We highly recommend you avoid using the 777 permission, which allows everyone full access.
Disable the file editing option so that only authorized users can touch the theme and plugin files from the WordPress dashboard. This practice prevents anyone from changing the theme or plugin files. As a result, anyone with backend access will use a secure file management and version control system.
Disable the file editing option in WordPress by including the following code in the wp-config.php file:
define(‘DISALLOW_FILE_EDIT’, true);
Note: Learn more about file permission settings from WordPress Developer Resources.
You can improve your WordPress website security by enabling SSL ( Secure Sockets Layer) encryption. It encrypts the connection between your website and the browser of your visitors. In this way, it protects your visitors’ login credentials, personal information, and payment information.
Your site will showcase a padlock icon in your web browser’s address bar if it includes SSL encryption. This creates trustworthiness in your users’ minds, and they feel safe while engaging with your website.
Moreover, SSL encryption is crucial for getting a better position in search engine result pages. Google allows secure websites with higher search engine ranks, especially those with SSL certificates. This is how SSL can improve your website’s visibility with a better position in search results.
Always leverage the hosting provider that offers you free SSL certificates. With this certificate, use HTTPS to configure your website. This enables secure redirection of traffic on your website.
Two-factor authentication provides an extra layer of security during the login process to your site. Users must go through two forms of identification before accessing their account on your site. This means they have to provide a password, a token, or a code using their smartphone or email address.

The two-factor method allows users to go through two forms of identification before accessing their account, such as:
The 2FA authentication process shields your website from unwanted access or hacking attempts. As a result, unauthorized users cannot get into your website even if you have lost or compromised your password.
Two-factor authentication also tackles brute force attacks and phishing attempts on your site. It becomes almost impossible for hackers to breach your website due to the second stage. Concerned users also feel safe while browsing websites with a two-factor authentication system.
You can easily implement 2FA using plugins like Loginizer, Wordfence Login Security, and WP 2FA. This plugin comes with user-friendly features and options to integrate two-factor authentication into your website.
You can also include CAPTCHA in forms on your website, which blocks spam and bot attacks. CAPTCHA is the short form of the Completely Automated Public Turing test that tells Computers and Humans Apart.
This process adds small challenges for human users during the login process. Users must complete a simple task like matching words, clicking valid images, or clicking checkboxes. Bots cannot identify or overcome these challenges, which makes the login process more secure.

Hackers can easily submit information to your website using the forms. Thus, using CAPTCHA in forms is the most common best practice. You can also block malicious or spam comments and links on your site using CAPTCHA.
You can simplify the CAPTCHA implementation process using plugins like Advanced Google reCAPTCHA, hCaptcha for WP, and reCaptcha.
Let’s say you are busy handling the business aspects of your website as a small business owner. In that case, handling the WordPress website security may not match your skill set. In that case, you can hire a professional WordPress maintenance service to maintain your site’s security.
ThemePaste offers top-notch WordPress website maintenance services that are within your budget. They can handle security, maintenance, development (plugin & themes), theme design, website migration, and more. You can simply use their service packages and work on your business.
Maintaining WordPress website security is a must if you want to achieve a successful online presence. Take your time to implement the tips we’ve mentioned above. These proven methods can be the foundation for establishing a secure website. Ultimately, your business reputation will increase when your visitors feel safe browsing your website.
Why Choose WordPress for E-commerce Website Development
There are numerous platforms to launch an eCommerce website that you dream of. But choosing the right platform is essential when you are looking from both the customer and site owner’s end.
WordPress is a top-rated platform that powers 40% of websites worldwide. It’s the most popular CMS for eCommerce because of its unique blend of flexibility, scalability, and user-friendliness. People also prefer this platform because it offers endless customization options. This means you can grow your eCommerce site as your business evolves.
You need a significantly low cost to launch your WordPress eCommerce website. Plugins like WooCommerce provide all the features you need to launch your eCommerce store. However, you can also minimize the costs and hassle by hiring affordable WordPress maintenance services.
In this article, we will explain why the WordPress eCommerce platform is best for your online business. So, let’s learn the true potential of WordPress for eCommerce over other platforms.
WordPress is not the only CMS that provides an eCommerce platform in the marketplace. Other big platforms include BigCommerce, Shopify, Wix, and Squarespace. But WordPress offers unparalleled features, flexibility, scalability, and user-friendliness.
In 2024, more than 40% of websites prefer WordPress over other platforms on the web. Plus, it powers over 3.8 million online stores using WooComerce, which is growing continuously.
With plugins like WooCommerce, it becomes easy to launch an online store, even for beginners. Using plugins and extensions, you can add more features according to your business objectives and growth. Besides, the vast library of themes, templates, and page builders allows you to design the website as you imagine.
Now let’s explore a quick comparison between WordPress and other major market players, including Shopify, Wix, and BigCommerce. This comparision will give you an overall idea on why WordPress eCommerece website is the best choice for running your online business:
| Feature | WordPress (WooCommerce) | Shopify | Wix | BigCommerce |
|---|---|---|---|---|
| Cost | Low (open-source) | Monthly subscription | Monthly subscription | Monthly subscription |
| Customization | Highly customizable | Limited | Moderate | Moderate |
| SEO Control | Full control (plugins like Yoast) | Limited | Basic | Advanced |
| Scalability | Highly scalable | Good for small-mid stores | Limited | Enterprise-ready |
| Ease of Use | Moderate (needs setup) | Very easy | Very easy | Moderate |
| Payment Gateways | Unlimited (via plugins) | Limited (extra fees for third-party) | Limited | Many built-in |
Let’s learn in detail why we choose WordPress e-commerce website development over others:
People love to navigate through a user-friendly interface, and WordPress is good at it. It is built with beginners and people with development experience as well. Anyone with minimal tech knowledge can navigate the dashboard and manage their website. You can easily add new products, manage inventory, process orders, and maintain your eCommerce store.
WordPress gives you complete control over your website’s and business’s features and design. The user interface requires a pretty simple learning curve, which enables you to focus on the core operations of your eCommerce store.
If you are not a developer, how hard is it to create a WordPress eCommerce website? Fortunately, WordPress installation is pretty easy, and you simply need to follow the installation instructions or prompts. Most of the hosting providers even allow you to install the site with a single click. So, having a fully-fledged WordPress site takes a few minutes in total.
Then comes the WooCommerce plugin, which you must install and activate after installing WordPress. WooCommerce also gives you a simple setup process with an easy-to-understand guide for every step. Every setup process, from store configuration and payment gateway setup and shipping option, is easy to grasp.
So, you can establish an online presence as you think and start selling your products without worrying too much. Small businesses and startups can benefit from this fast setup process without investing too much in development. Besides, there are some affordable WordPress development services out there to handle all of these for you.
WordPress eCommerce website is more than just setting up your online store for selling. You can extend your startup from scratch and transform it into a huge online store. This is possible due to WordPress’s vast library of eCommerce-specific themes and plugins.

It is really important to attract customers and compete in this evolving online marketplace. This is where WordPress stays ahead and lets you design a website with a unique look and feel.
Plenty of themes are available to create a store that reflects your brand and product offerings effectively. Besides, these themes are perfectly built with performance, SEO, and user experience in mind.
WordPress also has a huge plugin library offering over 50,000 plugins. As you grow, you can enhance your online store with new features using these plugins.
Take a look at WooCommerce, which transforms your WordPress site into a fully functional eCommerce store. It gives you the freedom to organize your store’s products, inventory, payment, shipping, and more. However, there are more plugins to add features like SEO, product promotion, store security, customer relation management, and so on.
Customization is an undeniable feature when it comes to developing a modern WordPress eCommerce website. Other platforms out there won’t give you this much control over design, features, and expansion. But WordPress lets you tweak the themes and plugins to the greatest extent.
You can even add custom code to your themes and plugins and recreate it perfectly for your store. This much control over customization makes WordPress perfect for showcasing your brand image with an outstanding user experience.

Moreover, page builders like Elementor make eCommerce website development even more fun. Elemetor offers a drag-and-drop user interface, allowing you to design your website just as you want. With zero coding knowledge, you can customize an existing template or create one by yourself.
You can showcase and customize your online business with more features whenever the market trend changes. Thus, you will never stay behind in this crowded and competitive marketplace.
Scalability is another essential consideration while developing a WordPress eCommerce website. Your website will have to face more traffic, a bigger product catalog, and complex transactions while growing. WordPress has the capability to scale your online store and maintain its user flexibility.
Initially, you can start your eCommerce store and expand it with more products, categories, and functionalities. However, the open-source nature of this platform allows you to use its powerful infrastructure to grow your business. Therefore, you can sync with the store without sacrificing the speed and user experience that your customer prefers.
You don’t need to worry about the overgrowth of the store and management when using WordPress for eCommerce. You can handle multiple eCommerce stores with multisite capabilities from a single WordPress dashboard. This means you can manage multiple brands, regional stores, or targeted content from a single WordPress installation.

Each website you operate can have its own identity, product, design, and brand voice. This means you don’t need to shift your focus to multiple stores simultaneously. Multisite capability is more beneficial if you are targeting international business.
You can create different WordPress eCommerce websites for different countries. Then, you can place localized currency, specific product lines, and payment options. Besides, you can easily set administrative permissions for specific users for each store. This minimizes your site management task, especially if you hire a WordPress maintenance service from wordpressrdirect.
You obviously need search engine optimization to reach a larger audience for your eCommerce store. The built-in SEO features of WordPress are perfect for eCommerce stores to place their products in a suitable place for a search output.
You can create clean URLs that are SEO-friendly and help you stay on top of search engine result pages. Your content will rank flexibly due to the SEO-friendly structure of your site’s blog page. You have the freedom to populate the site with quality content, product pages, categories, and menus in a way that will improve your search engine visibility.
Furthermore, you can extend the SEO features of your eCommerce website using plugins like Yoast SEO, AISEO, and Rankmath. These plugins allow you to optimize a specific webpage and its content with best SEO practices. You can even create proper title descriptions and implement Keywords easily.
You can also handle the XML sitemaps, schema markup, and breadcrumbs for better search engine visibility. So, with minimal SEO knowledge, you can maintain search engine visibility and reach out to more customers.
WordPress gives you the freedom to reach out to an audience by marketing products through blogging. This is a significant advantage for WordPress eCommerce websites since you are not just selling products.
WordPress allows you to include a blog within your website, which other platforms lack. This enables you to gather organic traffic by creating SEO-rich content and highlighting your site in search engines. Besides, you can even link your blog content to your eCommerce store’s product page.
You can share eCommerce-related blog posts, product reviews, and industry trends with your customers. This allows customers to collect information for your blog and also utilize your store. When customers get products and marketplace news in the same place, they trust your site. As a result, your website authority and conversion rate will go high.
WordPress eCommerce website maintains strong security measures to prevent any data loss. It highly focuses on updates and prevents any latest threats with dependable capabilities.
WordPress frequently updates its core functionalities with advanced features and security patches. You simply need to maintain the updates or enable auto-updates to keep your site secure. All these updates ensure that your site stays secure against the latest threats and hacking attempts. Ultimately, your customer feels secure and provides their personal information without any hesitation.
Additionally, you can use security plugins to fortify your site even better than the default protection features. For example, Wordfence can defend your site with additional security layers via firewalls, malware scanning, and secured login options. So you can easily secure your eCommerce site from unauthorized access or cyber-attacks.
Transactional data are very sensitive when it comes to protecting eCommerce stores. WordPress is good at saving your store’s payment gateways by integrating safe options like PayPal and Stripe. These payment options are highly secured with encryption and fraud detection features.
Last but not least, the WordPress eCommerce website comes with SSL certificates. The secure sockets layer ensures that the data transmitted between your site and customers is always safe. This encryption helps you maintain your site’s trust worthiness because search engine prefers sites with SSL certificates.
WordPress eCommerce websites are cost-effective solutions for those looking to start their eCommerce journey. You need little to no investment to initiate your online store with free themes and plugins. You can gradually upgrade to premium plugins and themes with affordable pricing plans. So, you can start small but grow big when your budget will support your requirements.
You can compare WordPress with many other platforms out there, but it is indeed the most budget-friendly option. You will never be out of resources or budget because customized plans are available for premium plugins and themes. Therefore, you can focus on your business aspects rather than worrying about platform costs.
WordPress eCommerce websites require lower maintenance costs compared to any other platforms. Obviously, you need to maintain your online business website at some point in time. You can easily handle core updates, theme updates, and plugin updates with a small business site. You won’t need the developer’s support or extensive technical knowledge to handle the basic updates.
However, you need proper maintenance when your store grows bigger, with a huge product list and a lot of marketing effort. This is where WordPress maintenance services come in and handle your complex maintenance tasks. There are many affordable maintenance services out there to choose from.
Last but not least, WordPress has a huge, active community where you can get the latest resources, tutorials, and documentation. You can even get professional help from this community and minimize your investment in maintenance.
You must cope up with the latest WordPress eCommerce trends to stay competitive and relevant in the marketplace. We are focusing on some recent trends that will help you boost your covnersion, improve your site’s SEO, and overall user exprience.
AI is reshaping the way csutomer navigates and uses a WooCommerce stores. It is personalizaing the shopping experience through different plugins. Therefore customers can now get product suggestions according to their behavior or activities at your website.
So, dynamic produict suggestions are minimizing the bounce rate by hooking up the customers with relevant products. Autoamted up-selling and cross selling is also improving sales since AI is always suggesting the right product to the right customers. With data driven product recommendation, your customers are mostly enaged at your store.
Around 30% users are searching products through voice searches using voice assistanace like Alexa, Google Assistant, and Siri. You shouldn’t miss out this opportunity and optimize your site for Google Voice Search option. You can implement long tail conversational keywords in your website’s product pages.
You should also optimize your site for local SEO since vocie searches are mostly location based. Lastly, voice searhes are done using mobile device which increases the necessity to optmize your site for mobile-friendliness.
Make a Headless WordPress eCommerce website using WooCommerce with React, Vue.js, or Next.js. Your website will be super fast since this method seperates the frontend from the backend. With improved website speed, your site will get better ranking opportunities.
Your store can handle mroe traffics due to better scalability of this method. Plus, there is a huge flexiblity to craft a custom and interactive storefront that can outpace your competitors.
Product representation plays a vital role in attracting your customer’s attention towards your store. Thus, you can implement Artificial reality (AR) and Virtual reality (VR) for better product visualization. These methods allow customers to view the products as if they are viewing it in real life.
AR and VR product representaiton is very effective to enable virtual try-ons for produts like cloathing, eyewear and furniture. Zoom in option with a 360° product spin is also a great way to showcase the product with more details. You can minimize your store’s return rate since csutomers can see exactly what they’re getting.
Complex checkout process can kill the sales opportunity of your WordPress eCommerce website. Threfore, implement fast checkout options either using plugins or by custom website development. Your website should have a guest checkout options that doesn’t require any sign up process. Your store should also have options to autofill the billing and shipping info for finishing the purhase process with minimum delay.
WordPress gives you a complete package when it comes to developing an eCommerce website. We can mention thousands of reasons, but we have listed the best ones behind its popularity. You can start your WordPress eCommerce website from scratch or expand over an existing one with minimal effort.
However, you can rely on ThemePaste if you are not interested in the DIY approach of WordPress. From installation to maintenance, ThemePaste handles every aspect of your eCommerce store, leading you to success. You can relax and focus on your business while we maintain your site like a pro.
Why Regular WordPress Maintenance is Crucial for your Website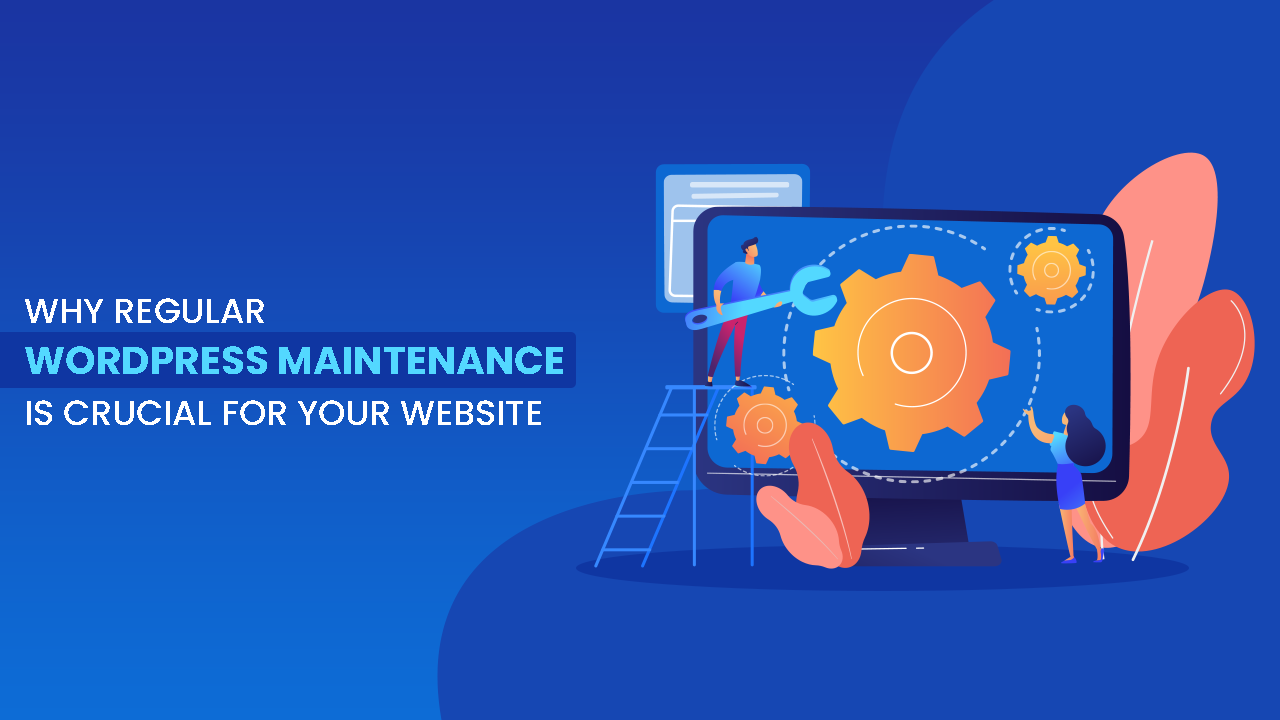
Regular maintenance is crucial for the long-term success of your WordPress site. It helps your site operate smoothly with updated plugins, themes, and security features. Besides, regular WordPress maintenance ensures that users will get everything they expect and that you will get the most out of your investment.
Why focus on maintenance rather than on the business aspects of the website? You need to adjust to the changes and updates that WordPress regularly makes. Plus, with every bit of growth in your business, you must make some changes on your site that need maintenance.
In this article, we will discuss why regular WordPress website maintenance is essential for your website. We will also share some maintenance tips so that you can run your website without any flaws.
Regular WordPress website maintenance involves crucial tasks so that your website runs properly. These tasks ensure that your website is safe from cyber-attacks, loads fast, and maintains user-friendliness.
Here are some everyday WordPress website maintenance tasks:
These WordPress website maintenance tasks will keep your site at its peak performance with a better user experience.
WordPress periodically updates its core functionalities and the integrated MySQL database. Also, you need to update the plugins and themes you use. Without regular maintenance, you will face a broken or slow website that is vulnerable to security threats. Here are some reasons why you must take WordPress site maintenance seriously:
Security is the top priority when it comes to saving your website and investment from cyberattacks. Since WordPress faces 90,0000 attacks per minute, you should regularly maintain all the security measures of your website.
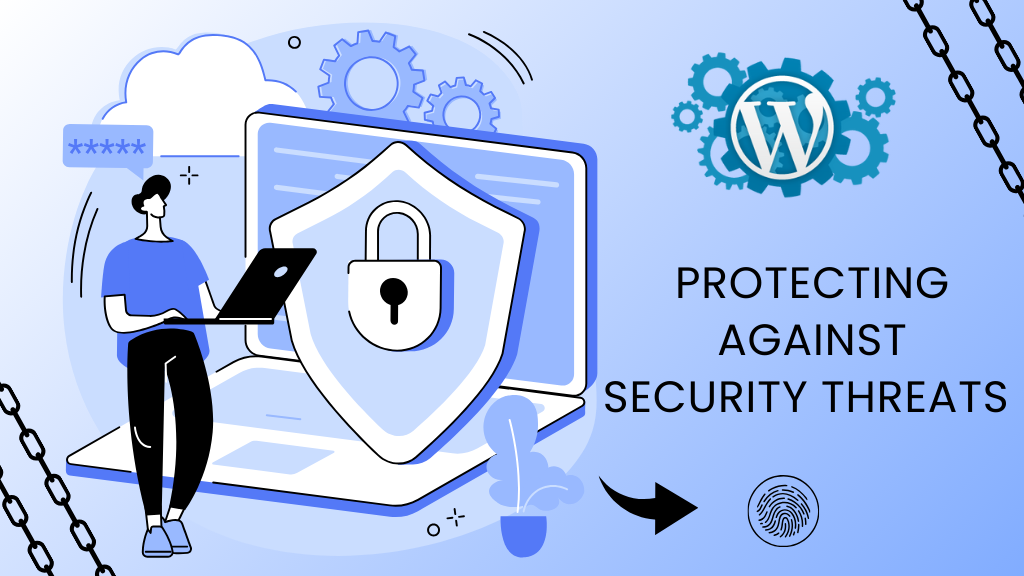
Regular WordPress website maintenance service protects your site against social engineering attacks, ransomware, malware, phishing attacks, and DDoS Attacks. Here are some WordPress site maintenance tips for maintaining security:
User experience is the key to keeping your customers stuck to your website by avoiding alternative sites. You can provide a top-notch user experience with reliable WordPress website maintenance services. Thus, users will get minimal loading time and won’t face any errors while using your website. Here are some WordPress site maintenance tricks:

User experience is key to bringing success to any WordPress website by filling out the gap between brand and audience. With a smooth user experience, you can retain customers easily on your website. Regular WordPress maintenance can ensure your site stays user-friendly and gains a positive reputation for your brand. Let’s explore the following tips to increase user experience on your website:
Search engine optimization or SEO improvement will put your website in a better position in search results. This helps your customers find your website easily and with minimal effort. Regular WordPress maintenance can improve SEO and get more customers with lower bounce rates. Here are some maintenance tips to improve your site’s SEO:
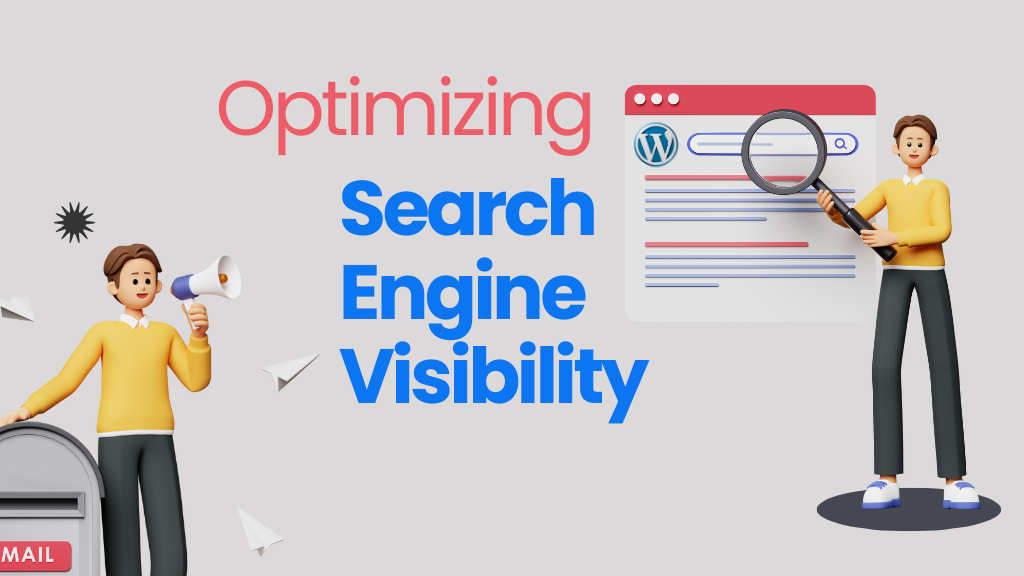
A reliable WordPress maintenance service can meet all your SEO factors if your page ranking does not meet your expectations.
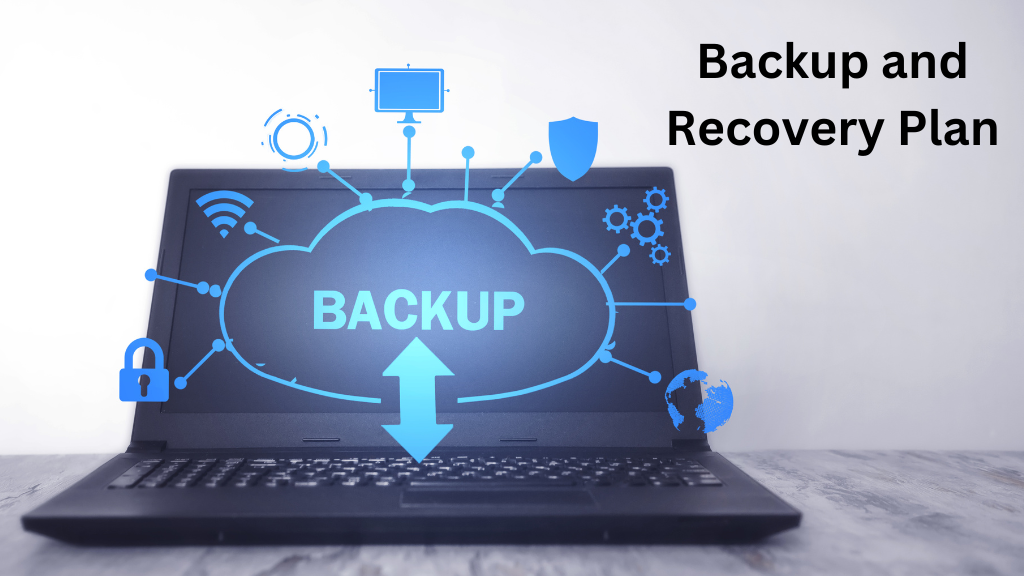
Disaster is an uncertain phenomenon that can ruin your website data without a backup and recovery plan. Therefore, you should have a back and recovery plan as your regular WordPress maintenance task.It will help you safeguard your data during a disaster such as a flood, tornado, or wildfire. Here are the steps you can implement as your backup and recovery plan:
Regular WordPress maintenance helps you find out whether you comply with all the legal requirements. Legal regulations such as GDPR, CCPA, DPRA, and others are vital if you are running your online business globally. Following these legal regulations will prevent your website from getting any legal penalties. Here are some maintenance tasks that you can follow:
Regular WordPress maintenance is not only about running your website smoothly for user experience. It also focuses on other benefits, such as staying in the frontline of the competition and monitoring them. Besides, it helps you to learn their business tactics and implement new features in your website. Here are some maintenance tasks to adapt:
With regular WordPress maintenance, you can go beyond the industry standards. As a result, you will gain a competitive advantage that will lead you toward success.
Regular WordPress maintenance is crucial for achieving continuous success for your WordPress site. With regular maintenance, you are preventing security threats, boosting performance, and optimizing your SEO strategies.
Additionally, it ensures that you have reliable backup plans, comply with legal aspects, and stay competitive within the industry. So, investing in maintenance maximizes the return on your investment alongside an effective online presence.
Why Custom WordPress themes are Essential for Your Brand Identity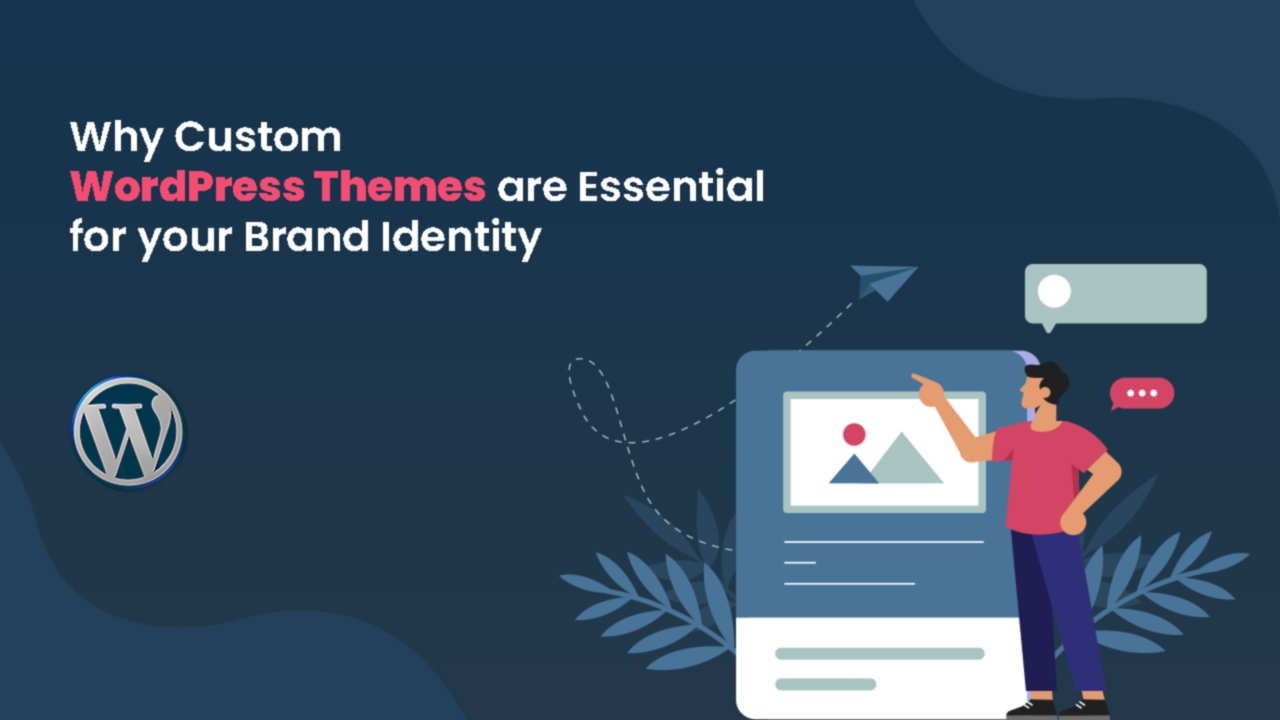
Custom WordPress themes are essential for creating a unique brand identity in this competitive era. It allows you to represent your brand value and present your business uniquely. You can personalize every section of your site, which is impossible with generic templates.
The first impression of your website matters since it connects your business with the customers. So, a custom theme that perfectly aligns with your brand can improve user experience, site performance, and SEO rankings. Plus, it helps customers to distinguish your brand from others and rely upon it.
In this article, we will explore why custom WordPress themes are beneficial for establishing your brand identity. So, let’s learn the advantages of custom themes and the steps involved in creating one that reflects your brand effectively.
People care about the visual elements that drive their emotions about a brand or a company. Some of the unique components of a brand include a logo, color scheme, typography, and so on. These elements are unique for every brand, which differentiates one business from others. Plus, a strong brand identity maintains consistency across the web which makes it easily discoverable and identifiable.
A website showcases your brand’s online presence that holds its identity towards its visitors. It reflects a brand’s voice and characteristics with a unique experience for the visitors. You can create your website’s unique identity by aligning the design with your brand.
So, WordPress custom theme development helps you earn recognition and earn the trust of customers. Thus, you get customer loyalty and ultimately achieve success in the long run.
Premade WordPress themes are incomplete in terms of showcasing a brand identity or matching your requirements. It comes with limited features that may not reflect your unique brand identity effectively. These limitations of pre-built themes will inspire you into WordPress custom theme development:
Generic Design: Prebuilt themes are built with a border audience in mind, which may not satisfy your visitors. Be sure your brand may not match the design that is made without your preference or instructions. Your visitors will try out alternative options with similar design patterns. So, premade or generic design can backfire when it comes to showcasing the uniqueness of your brand.
Limited Customization Options: Premade themes do not offer the freedom of customization that a custom WordPress theme offers. It’s the output of a designer’s imagination that won’t match your requirements. Prebuilt themes won’t let you adjust all the elements beyond basic settings. However, custom theme development is all about better coding and development skills that give you massive customizability with additional costs.
Risk of Overuse: Website owners typically use a popular theme to present their brand identity. But they end up showing the same thing with different names to the customers. So, the chance is that prebuilt themes will mix up your brand’s uniqueness in the crowded marketplace. Customers won’t remember your brand because it won’t create any impression due to overuse.
Compatibility Issues: Pre-made themes are not specifically made for a brand or business. You may not find the specific features on a premade theme that you are looking to represent your brand’s uniqueness. You need to tweak the theme and customize it yourself or by a developer which requires time. Besides, adding third-party tools can extend the features but hamper the effectiveness of your site.
Now you know why WordPress custom theme development is necessary. Let’s leran about the advantages of developing unique WordPress theme:
Creating a custom WordPress theme is not only about showcasing the design of your website. It should interact with your customers with unique performance and usability. This user flexibility will also reflect your brand’s uniqueness. Let us explain the advantages of custom theme development for presenting your brand’s identity:
Custom WordPress themes can fully represent your brand’s unique design requirements. Prebuilt themes and templates aren’t built with specific requirements in mind, but custom themes are.
While developing a custom theme, you can define the color pallet, font style, and design pattern. That is why it reflects your brand identity and connects your target audience effectively. You are spreading your brand’s voice by defining every element with your unique vision and mission.
Some unique design expectations usually include:
Your website and its brand identity stay unique in this huge marketplace with a high level of customization. As a result, customers can identify you because of your unique design pattern that is not available anywhere else.
Getting specific features for your brand is another advantage of WordPress custom theme development. Traditional themes are built with features that may not meet the specific goal of your brand or business.
However, a custom theme gives you the features that truly matter to reflect your brand identity. It can be a unique layout that reflects the content perfectly for your brand. It can also be a unique add-on that comes with a custom theme to offer an enhanced feature.
Custom themes will integrate flexibly with any tools or add-ons that you are using. Besides, it should work smoothly with marketing automation tools or eCommerce solutions. So, custom themes are not only good for your brand image but also functions smoothly with the tools available at your website. As a result, visitors can easily achieve their objectives at your site and remember your brand’s uniqueness.
WordPress Custom theme development prioritizes scalability and flexibility with growth of your brand. Your theme needs to evolve with your business growth and this is where scalability matters.
Pre-developed themes are mostly built with restrictions when it comes to advance customization. Whereas custom themes gives you the freedom to include additional features and content. Moreover, you can rebrand the theme even if you create multiple websites with it.
The custom theme keeps your website up to date in real time to sync with the changes in your brand’s identity. It becomes easier for you to cope with the updates since you are the one behind the design idea. Getting help from a professional WordPress service can be a great alternative for creating your personalized theme.
WordPress custom theme development brings better performance and faster loading time. This is possible because the entire theme is built on optimized custom code. Pre-built themes comes with additional features that you don’t even need. On the other hand, custom themes are built only to meet your band requirements and necessary features.
Custom themes are built to promote your brand according to your business type. Therefore, the SEO configuration are done specifically to promote your brand effectively. Thus, it includes only necessary codes with proper meta tagging options. Besides it focus on mobile responsiveness by presenting your brand uniquely for all device types.
Your brand gets the exact attention it needs from the search engine via custom themes. Thus, it ranks higher in the search engine results by grabbing more traffic.
WordPress custom theme development ensures better security, which improves your brand reputation. You cannot guarantee that the pre-built themes will be perfectly built with a clean code structure. Pre built themes can include the following issues that can harm your brand identity:
But custom theme development focuses your requirements where you can monitor everything. If you are not skilled enough, you can rely on professional WordPress development services.
Furthermore, custom theme gives you the advantage of getting instant support from the developers. Pre-built themes won’t provide you instant support or fix issues only for your brand. But you can get regular updates, instant support, and security patches for custom theme. This allows you to get a theme that functions smoothly and serves your brand’s purpose.
There is no guarantee that you won’t need a plugin while using a premade theme. So, you may need to install plugins to include a simple feature in your website to fulfill your brand’s requirements.
However, WordPress custom theme development removes the need to install extra plugins. Professional team of developers can add brand-specific features within your theme. This means you will get the features to keep your brand identity intact.
Ultimately, you will get a faster page loading speed by reducing the plugin dependencies. Plus, your theme will be lightweight and have minimal chance of vulnerabilities to security threats.
You can start WordPress custom theme development with a professional WordPress development service providers. Here are the factors you should consider for developing a custom theme to preserve your brand identity:
ThemePaste is a reliable name when it comes to WordPress development, design, and maintenance. They have a group of professional developers who can accurately meet your business requirements to reflect your brand identity. Besides, they can also handle your entire website maintenance effort.
Strong brand identity will direct more organic traffic to your website due to the trustworthiness of your website. Therefore, you should invest in WordPress custom theme development rather than relying on prebuilt themes. It will help your represent your brand’s unique characteristics and maintain continuous growth.
You are not only focusing your brand but also focusing on what your customer’s love about it. As a result, you are creating one of a kind online presence that leads your brand towards success.
We will reply within 2 hours